14 Bundle Your Functions Together in Your Own R Package
14.1 Intro
In the late 2010s, Travis Gerke and Garrick Aden-Buie were working on the Collaborative Data Services Core team at the Moffitt Cancer Center. Researchers throughout Moffitt needed to access data from databases, and Gerke and Aden-Buie were in charge of helping them. Gerke and Aden-Buie would write R code for each researcher. But they eventually realized that they were reusing the same code over and over. Why not instead share the code with the researchers themselves?
In Chapter 13, I said that creating functions was a better approach than copying code. That is true, but only partially so. The even better approach is to create those functions and then bundle them into a custom R package. That’s exactly what Travis Gerke and Garrick Aden-Buie did. And by making a package with functions to access data from databases, they simplified their own work, and that of the researchers they supported. No longer did researchers have to ask Gerke and Aden-Buie for help. They could now install the package they had made and use its functions themselves.
In this chapter, I discuss how to make your own R package. While privacy concerns preclude me demonstrating the package that Travis Gerke and Garrick Aden-Buie made, they walked me through the development of a simple package that includes a custom ggplot theme. I’ve drawn from this conversation to show how I could take the theme_dk() function I made in Chapter 13 and add it to a custom package. Making your own R package may seem daunting, but if you know how to make your own functions, you’re halfway there. This chapter will get you the rest of the way there.
How to Create a Package
How do you know whether functions you write should be one-offs that stay in an individual project or merit being put into a package? The answer is simple: if you plan to use the function in multiple projects, put it into a package. As Travis Gerke put it to me, a functions.R file that you copy across projects “screams ‘make a package.’” The functions that Gerke and Garrick Aden-Buie made to access databases can be used across multiple projects. In Chapter 13, I made a custom ggplot theme. I can use this function in any project where I make data visualizations so it’s a great candidate for a package as well.
Starting the Package
The simplest way to create a package in RStudio is to use the File menu, then select New Project. From there, select New Directory. You’ll be given a list of options, one of which is R Package. Select that and you’ll then need to give your package a name (I’m going to call mine dk) and decide where you want it to live on your computer. You can leave everything else as is.
TODO: Add screenshot create-r-package.png
RStudio will now create and open my package. There are a few files in our package already, including hello.R, which has a prebuilt function called hello() that, when run, prints the text “Hello, world!” in the console. This file is similar to the default content that is added to R Markdown documents. Let’s get rid of it and a few other default files so we’re starting with a clean slate. I’ll delete hello.R, NAMESPACE, and the hello.Rd file in the man directory.
Much of the work we’ll do working with our package relies on the usethis and devtools packages. Install those using install.packages() if you don’t already have them installed. Once you’ve done that, you’re ready to add a function to the package.
To do so, load the usethis package and then run the use_r() function. This function will create a file in the R directory with the name you give it as an argument (all functions in a package go in files in the R folder). Running this code (I typically do this in the console since we don’t need to save our code) will create a theme.R file:
Now that I have this file, I can add code to it. I’ll copy the theme_dk() function I created in Chapter @ref(functions-chapter.R):
theme_dk <- function(show_grid_lines = TRUE,
                     show_axis_titles = TRUE) {

  custom_theme <- theme_minimal() +
    theme(panel.grid.minor = element_blank(),
          axis.ticks = element_blank(),
          axis.title = element_text(size = 12,
                                   color = "grey50"),
          axis.title.x = element_text(margin = margin(t = 10)),
          axis.title.y = element_text(margin = margin(r = 10)),
          axis.text = element_text(size = 12,
                                   color = "grey50"),
          plot.title.position = "plot",
          plot.title = element_text(size = 20,
                                    face = "bold",
                                    margin = margin(b = 8)),
          plot.subtitle = element_text(size = 14,
                                       color = "grey50"),
          legend.text = element_text(size = 12),
          legend.position = "top")

  if (show_grid_lines == FALSE) {

    custom_theme <- custom_theme +
      theme(panel.grid.major = element_blank())

  }

  if (show_axis_titles == FALSE) {

    custom_theme <- custom_theme +
      theme(axis.title = element_blank(),
            axis.title.x = element_blank(),
            axis.title.y = element_blank())

  }

  custom_theme

}
Because we developed theme_dk() in Chapter 13, we know it works. But there are some particularities about package development that we need to take into consideration.
Checking our Package
To test that our package works, run the function check() (first load the devtools package) in the console (this runs what is known as R CMD check). This function checks whether the package is developed correctly. This is important because you need to make sure that others can install your package on their system. Running R CMD check on the dk package gives us a long message. The last part is the most important:
── R CMD check results ─────────────── dk 0.1.0 ────
Duration: 9.5s

❯ checking DESCRIPTION meta-information ... WARNING
  Non-standard license specification:
    What license is it under?
  Standardizable: FALSE

❯ checking for missing documentation entries ... WARNING
  Undocumented code objects:
    ‘theme_dk’
  All user-level objects in a package should have documentation entries.
  See chapter ‘Writing R documentation files’ in the ‘Writing R
  Extensions’ manual.

❯ checking R code for possible problems ... NOTE
  theme_dk: no visible global function definition for ‘theme_minimal’
  theme_dk: no visible global function definition for ‘theme’
  theme_dk: no visible global function definition for ‘element_blank’
  theme_dk: no visible global function definition for ‘element_text’
  theme_dk: no visible global function definition for ‘margin’
  Undefined global functions or variables:
    element_blank element_text margin theme theme_minimal

0 errors ✔ | 2 warnings ✖ | 1 note ✖
Let’s review the output from top to bottom. The line “0 errors ✔ | 2 warnings ✖ | 1 note ✖” gives us the three level of issues with our package. Errors are the most severe (meaning others won’t be able to install your package), followed by warnings and notes (both of which may cause problems for others). It’s best practice to eliminate all errors, warnings, and notes.
Let’s start with the note. The note shows up in this section:
❯ checking R code for possible problems ... NOTE
  theme_dk: no visible global function definition for ‘theme_minimal’
  theme_dk: no visible global function definition for ‘theme’
  theme_dk: no visible global function definition for ‘element_blank’
  theme_dk: no visible global function definition for ‘element_text’
  theme_dk: no visible global function definition for ‘margin’
  Undefined global functions or variables:
    element_blank element_text margin theme theme_minimal
To understand what R CMD check is saying, we need to explain a bit about how packages work.
Dependencies
When you install a package using the install.packages() function, it often takes a while. That’s because, while you are telling R to install one package, that package likely uses functions from other packages. In order to have access to these functions, R will install these packages for you (they are known formally as dependencies). It would be a pain if, every time you installed package, you had to manually install any dependencies. But in order to make sure that the appropriate packages are installed for users, we have to make a few changes.
When we run R CMD check on our package, we are told that we have several “Undefined global functions or variables” and “no visible global function definition” for various functions. This is because we are attempting to use functions from the ggplot2 package, but we haven’t specified where these functions come from. I know that I can use this code because I know that I have ggplot2 installed. But we can’t assume that others will have ggplot2 installed so we need to install it for them when they install the dk package. To do this, we use the use_package() function from the usethis package as follows:
use_package(package = "ggplot2")It’s important to note that, while I use the meta package tidyverse (which contains multiple packages, of which ggplot2 is just one) when working on my own computer, when making your own package you want to only use individual packages. After I run this code in the console, I get the following message:
✔ Setting active project to '/Users/davidkeyes/Documents/Work/R Without Statistics/dk'
✔ Adding 'ggplot2' to Imports field in DESCRIPTION
• Refer to functions with `ggplot2::fun()`
The first line tells me that it is working in the dk project. The second line tells me that the DESCRIPTION file has been edited. This file provides meta information about the package we’re developing. If we open up the DESCRIPTION file (it’s in the root directory of our project), we see the following:
Package: dk
Type: Package
Title: What the Package Does (Title Case)
Version: 0.1.0
Author: Who wrote it
Maintainer: The package maintainer <yourself@somewhere.net>
Description: More about what it does (maybe more than one line)
    Use four spaces when indenting paragraphs within the Description.
License: What license is it under?
Encoding: UTF-8
LazyData: true
Imports:
    ggplot2
Way down at the bottom, look for the line that says “Imports:” followed by “ggplot2” on the next line. This indicates that, when a user installs the dk package, the ggplot2 package will also be installed for them.
foo::bar()
We’ll return to the DESCRIPTION file in a bit, but for now, let’s take a look at this line: “Refer to functions with ggplot2::fun()”. It is telling us that, in order to use functions in our package, we need to refer to them in a unique way. By specifying both the package name and the function name, you ensure that the correct function is used at all times. It is rare, but there are functions with identical names across multiple packages. Using this syntax avoids any ambiguity. Remember when we ran R CMD check and got this?
  Undefined global functions or variables:
    element_blank element_text margin theme theme_minimal
This is because we were using functions without saying what package they come from. All of the functions listed here come from the ggplot2 package so I can add ggplot2:: before them as follows:
theme_dk <- function(show_grid_lines = TRUE,
                     show_axis_titles = TRUE) {

  custom_theme <- ggplot2::theme_minimal() +
    ggplot2::theme(panel.grid.minor = ggplot2::element_blank(),
                   axis.ticks = ggplot2::element_blank(),
                   axis.title = ggplot2::element_text(size = 12,
                                                      color = "grey50"),
                   axis.title.x = ggplot2::element_text(margin = ggplot2::margin(t = 10)),
                   axis.title.y = ggplot2::element_text(margin = ggplot2::margin(r = 10)),
                   axis.text = ggplot2::element_text(size = 12,
                                                     color = "grey50"),
                   plot.title.position = "plot",
                   plot.title = ggplot2::element_text(size = 20,
                                                      face = "bold",
                                                      margin = ggplot2::margin(b = 8)),
                   plot.subtitle = ggplot2::element_text(size = 14,
                                                         color = "grey50"),
                   legend.text = ggplot2::element_text(size = 12),
                   legend.position = "top")

  if (show_grid_lines == FALSE) {

    custom_theme <- custom_theme +
      ggplot2::theme(panel.grid.major = ggplot2::element_blank())

  }

  if (show_axis_titles == FALSE) {

    custom_theme <- custom_theme +
      ggplot2::theme(axis.title = ggplot2::element_blank(),
                     axis.title.x = ggplot2::element_blank(),
                     axis.title.y = ggplot2::element_blank())

  }

  custom_theme

}
Now that I’ve specified that I’m using ggplot2 functions, I can run the check() function again.
❯ checking DESCRIPTION meta-information ... WARNING
  Non-standard license specification:
    What license is it under?
  Standardizable: FALSE

❯ checking for missing documentation entries ... WARNING
  Undocumented code objects:
    ‘theme_dk’
  All user-level objects in a package should have documentation entries.
  See chapter ‘Writing R documentation files’ in the ‘Writing R
  Extensions’ manual.

0 errors ✔ | 2 warnings ✖ | 0 notes ✔
When I do so, I now see that the notes have gone away. I still need to deal with the warnings. Let’s do that next.
Adding Documentation
Let’s look now at the “checking for missing documentation entries” warning. This warning is telling us that we need to add documentation of our theme_dk() function. One of the benefits of creating a package is that you can add documentation to help others use your code. In the same way that users can type ?theme_mimimal() and see documentation about that function, we want them to also be able to type theme_dk() and learn how it works.
To create documentation for theme_dk(), we’ll use what’s known as Roxygen, which is a way to create documentation of functions in R packages using a package called roxygen2. To get started, place your cursor anywhere in the function. Then, go to the Code menu and select Insert Roxygen Skeleton, as seen in Figure ?? below.
TODO: Add screenshot insert-roxygen-skeleton.png
Doing this will add some text above the theme_dk() function that looks like this:
#' Title
#'
#' @param show_grid_lines
#' @param show_axis_titles
#'
#' @return
#' @export
#'
#' @examples
This text is the skeleton of what is needed to create documentation of the theme_dk() function. The most notable feature is the #' at the start of each line. These are special comments that are used for Roxygen. We can now go in and edit the Roxygen text to create our documentation. Starting at the top, I’ll replace Title with a sentence that describes my function.
#' David Keyes's custom ggplot theme Next, you can see lines with the text @param. Roxygen automatically looks at the arguments in our function and creates a line for each one. On each line, we want to describe what the argument does. I can do this as follows.
#' @param show_grid_lines Should grid lines be shown (TRUE/FALSE)
#' @param show_axis_titles Should axis titles be shown (TRUE/FALSE)
Going down the Roxygen skeleton, we next see @return. This is where we tell the user what the dk_theme() function returns. In our case, it is a complete ggplot2 theme, which I document as follows:
#' @return A complete ggplot2 themeBelow @return is @export. We don’t need to change anything here. Most functions in a package are known as “exported functions,” meaning they are available to users of the package (in contrast, internal functions, which are only used by the package developers, do not have @export in the Roxygen skeleton).
The last section is @examples. This is where you can give examples of code that users can run to learn how the function works. Doing this introduces some complexity and isn’t required so I’m going to skip it. If you do want to learn more, Chapter 17 of the second edition of Hadley Wickham and Jenny Bryan’s book R Packages is a great place to learn about adding examples.
Now that we’ve added the documentation with Roxygen, there’s one more step. We can run devtools::document() in the console. This will do two things:
Create a theme_dk.Rd file in the man directory. This file is the documentation of our theme_dk() function in the very specific format that R packages need. You’re welcome to look at it, but you can’t change it since it is read only. The workflow outlined above with Roxygen is a much easier way to generate .Rd files than doing so by hand.
Create a NAMESPACE file. This file lists the functions that your package makes available to users. My NAMESPACE file now looks like this:
# Generated by roxygen2: do not edit by hand

export(theme_dk)
My exported theme_dk() function is now almost ready for users.
14.1.1 DESCRIPTION
We can run devtools::check() again to see if we have fixed the issues that led to the warnings. Doing so shows that the warning about missing documentation is no longer there. However, we do still have one warning.
❯ checking DESCRIPTION meta-information ... WARNING
  Non-standard license specification:
    What license is it under?
  Standardizable: FALSE

0 errors ✔ | 1 warning ✖ | 0 notes ✔
This warning is telling us that we haven’t given our package a license. For packages developed for the public, choosing a license is important (for information on how to choose the right one for you, see https://choosealicense.com/). It’s less important since we’re developing a package for our personal use, but we can still select one. I’ll use the MIT license by running usethis::use_mit_license() in the console. Doing so returns the following:
✔ Setting active project to '/Users/davidkeyes/Documents/Work/R Without Statistics/dk'
✔ Setting License field in DESCRIPTION to 'MIT + file LICENSE'
✔ Writing 'LICENSE'
✔ Writing 'LICENSE.md'
✔ Adding '^LICENSE\\.md$' to '.Rbuildignore'
The use_mit_license() function handles a lot of the tedious parts of adding a license to our package. Most importantly for us, it specifies the license in the DESCRIPTION file. If I open up that file, I see the following (go down the line starting with License to see the result of the change we just made):
Package: dk
Type: Package
Title: What the Package Does (Title Case)
Version: 0.1.0
Author: Who wrote it
Maintainer: The package maintainer <yourself@somewhere.net>
Description: More about what it does (maybe more than one line)
    Use four spaces when indenting paragraphs within the Description.
License: MIT + file LICENSE
Encoding: UTF-8
LazyData: true
Imports:
    ggplot2
RoxygenNote: 7.2.3
There are many other licenses you can use and Chapter 13 of R Packages covers them. The DESCRIPTION file lists meta data about the package. We can make a few changes to change the Title, add an Author and Maintainer, and add a Description. The resulting DESCRIPTION file might look something like this:
Package: dk
Type: Package
Title: David Keyes's Personal Package
Version: 0.1.0
Author: David Keyes
Maintainer: David Keyes <david@rfortherestofus.com>
Description: A package with functions that David Keyes may find
    useful.
License: MIT + file LICENSE
Encoding: UTF-8
LazyData: true
Imports:
    ggplot2
RoxygenNote: 7.2.3
Having made these changes, let’s run devtools::check() one more time to make sure everything is in order. When I do so, I get exactly what I hope to see:
0 errors ✔ | 0 warnings ✔ | 0 notes ✔Having developed our package, we’re now ready to use it.
14.1.2 Installing Package
When you’re developing your own package, installing it for your own use is relatively straightforward. Simply run devtools::install() in your console and the package will be ready for you to use in any project.
Of course, if you’re developing a package, you’re likely doing it not just for yourself, but for others as well. There are many ways you can make your package accessible to others, but the most common is to use GitHub. The details of how to put your code on GitHub are beyond what we can cover here, but the book Happy Git and GitHub for the useR by Jenny Bryan is a great place to get started. I’ve pushed the dk package to GitHub and you can find it at https://github.com/dgkeyes/dk. If you or anyone else wants to install it, you can run the code remotes::install_github("dgkeyes/dk"). That’s it!
For internal packages like the one that Travis Gerke and Garrick Aden-Buie developed at the Moffitt Cancer Center, you would use other strategies to distribute your package. But once users install your package, they have access to any functions within it. And any time you make changes to the package, you simply have others reinstall it and they’ll have the most up-to-date functions ready for use.
14.1.3 Example of running code with theme
Once you or others install the dk package, anyone can just add the line library(dk) in any R code then use the theme_dk() function. We can recreate the penguin bill length and depth histogram from Chapter 13 with the following code.
library(dk)
library(tidyverse)
library(palmerpenguins)

penguins %>%
  ggplot(aes(x = bill_length_mm,
             y = bill_depth_mm,
             color = island)) +
  geom_point() +
  labs(title = "A histogram of bill length and bill depth",
       subtitle = "Data from palmerpenguins package",
       x = "Bill Length",
       y = "Bill Depth",
       color = NULL) +
  theme_dk()
Figure ?? shows the visualization (which is identical to that seen in Figure ??) that this code produces.
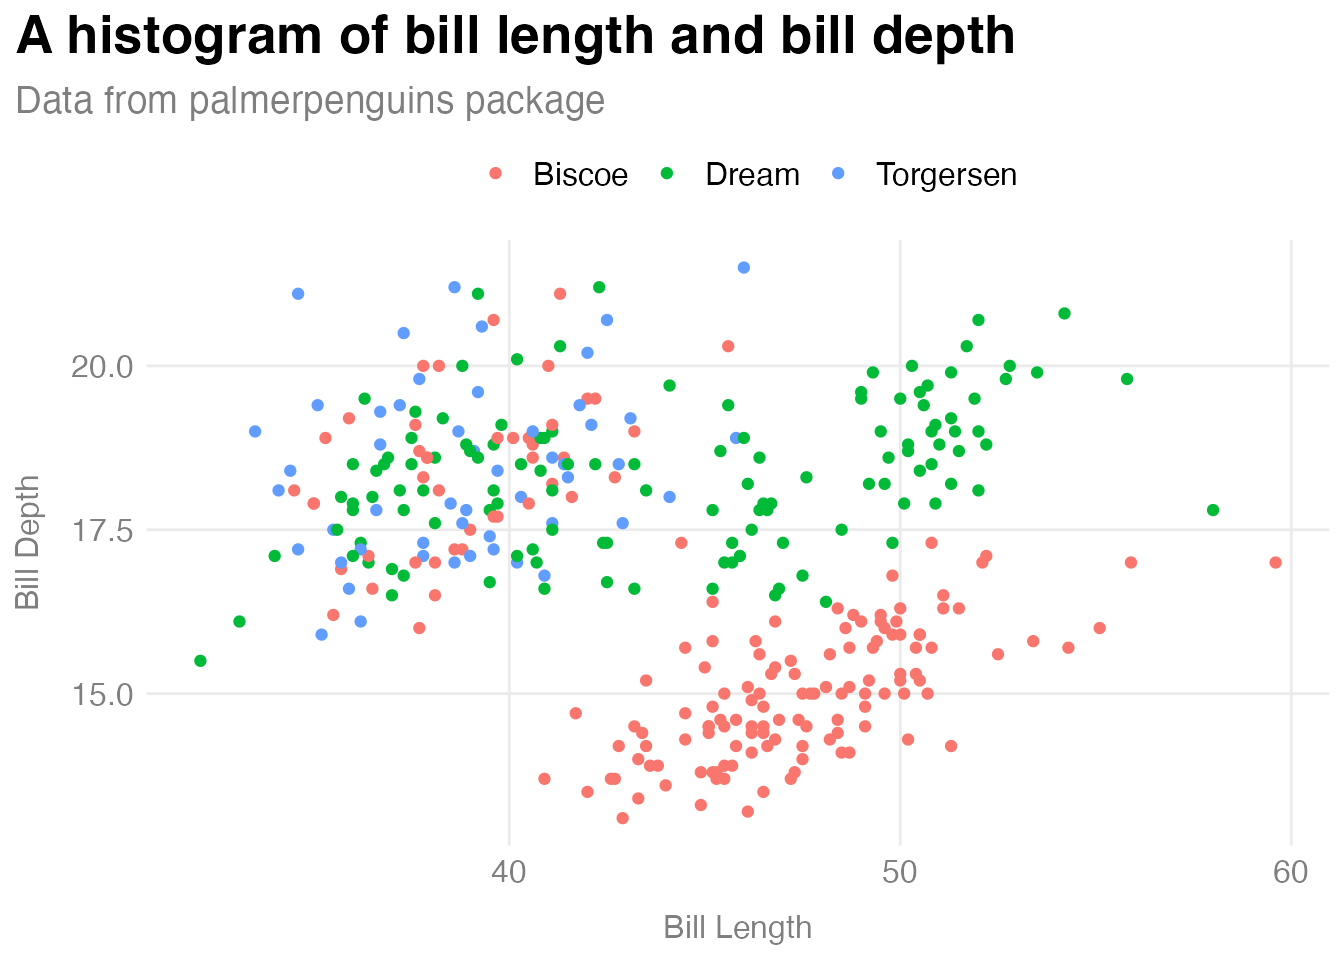
The histogram may be identical, but the process was not. While I had to manually define and run the code to create theme_dk() in Chapter 13, here I only have to run library(dk) and I have access to the theme_dk() function.
You’re Already Ready to Make Your Own R Package
In my conversation with Travis Gerke and Garrick Aden-Buie of the Moffitt Cancer Center I had a realization: the name package just refers to packaging up of a few things that allow you and others to reliably run your code. Combine functions, automatic installation of dependency packages to ensure others can run your code, and documentation and you’ve got a package. If you write code to share with others, it may or may not work on their computer. If you put it in a package, it is almost guaranteed to work.
Creating your own R package may seem scary, but it’s not as complicated as you might think. In 2021, experienced package developer and educator Malcolm Barrett gave a talk titled You’re Already Ready: Zen and the Art of R Package Development. Its message resonates deeply with me:
Many believe package development is too advanced for them or that they have nothing to offer. A fundamental belief in Zen is that you are already complete, that you already have everything you need. I’ll talk about why your project is already an R package, why you’re already an R package developer, and why you already have the skills to walk the path of development.
I hope this chapter has helped you to see that if you know how to make your own functions, you’re ready to make your own R package. And if you’re ready to go deeper, I highly recommend Hadley Wickham and Jenny Bryan’s book R Packages.
Conclusion
Making packages can help you as an individual. Creating a ggplot theme like I did in this chapter, for example, can allow you to easily use it on any data visualization you make. Packages can be especially beneficial for organizations. This is exactly what Travis Gerke and Garrick Aden-Buie found during their time at the Moffitt Cancer Center. Accessing databases was so complicated that many people got stuck at that point. But when Gerke and Aden-Buie provided them with functions to easily access the databases, Moffitt researchers began to do more. Gerke described the transformation: “People got to actually write code and do the data queries instead of handling administrative silliness.”
Developing packages can allow more advanced users to help those with less experience using R. Aden-Buie told me that packages create “a number of gradual on-ramps for people who are getting more skills in coding.” Because more people are able to use these on-ramps, they come to see the value of using code.
What’s more, developing packages allows you to shape how others work. Say you make a ggplot theme that follows the principles of high-quality data visualization (see Chapter 3). If you put it in a package, you can give others an easy way to use these principles. Garrick Aden-Buie calls this a “happy path.” If you create a package, you can guide people on the happy path that you think is best. For more advanced users, packages are a way to ensure that others use best practices without them having to make conscious decisions to do so.
Making your own package is not as hard as you might think, allows you to help others, and encourages best practices. The effort it takes is worth it for the benefits that making your own package offers.